
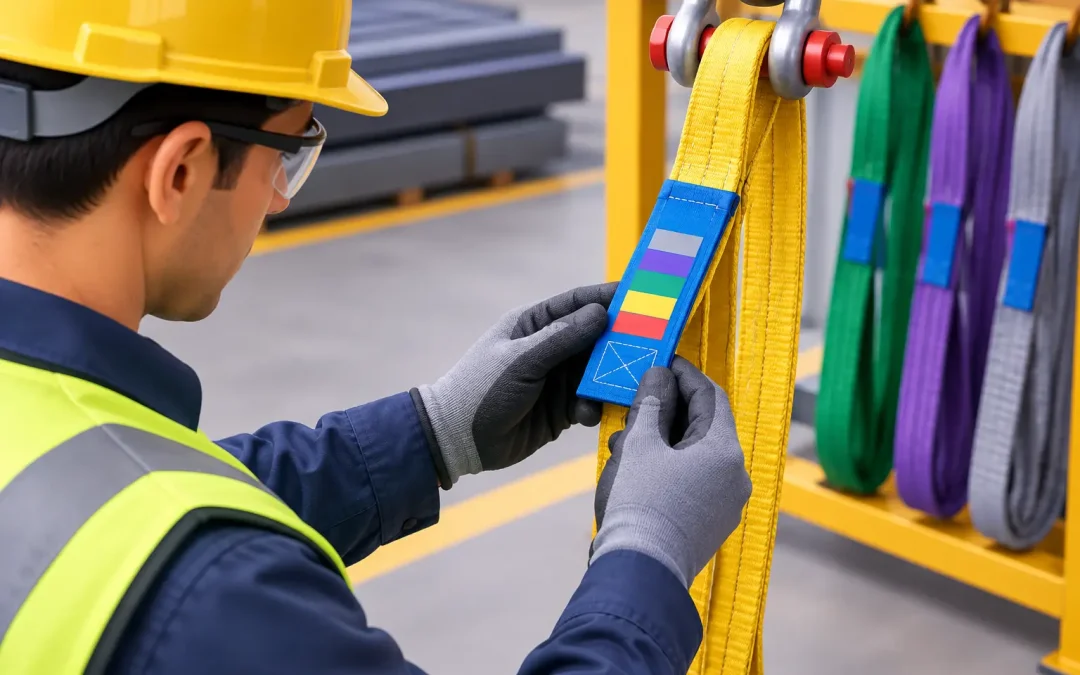
A sling can look serviceable and still be unfit for the lift. The tag is where the manufacturer identifies what that sling is, how it may be used, and the working load limit that applies. Knowing how to read sling tags gives the person in charge of the lift a fast way to catch mismatched capacity, incorrect hitch use, and equipment that should not be on the job.
Do not treat the tag as paperwork attached to the sling. It is part of the sling’s identification. If it is missing or unreadable, the sling may not be eligible for use until its identity and capacity can be verified through an approved process.
What a Sling Tag Tells You
Sling tags vary by manufacturer and sling type, but the information serves the same purpose: to establish traceability and safe use limits. On a synthetic web sling, the tag is usually sewn into the webbing. Wire rope, alloy chain, and wire mesh slings may use a metal identification tag or plate. Multi-leg assemblies can also have an assembly tag that identifies the complete rigging system.
Start by confirming that the tag belongs to the sling or assembly in your hands. A loose tag, a tag from another sling, or a tag that cannot be read does not establish capacity. The load rating must match the actual equipment, hitch, number of legs, and planned lift configuration.
Most sling tags include the manufacturer, sling type, material, rated capacities, size or length, and a serial number or other identification code. They may also include warnings, applicable standards, inspection instructions, and a date or production code.
How to Read Sling Tags Step by Step
Identify the sling type and material
Read the product description before looking at capacity. A polyester web sling, round sling, wire rope sling, and alloy chain sling do not have the same damage limits, environmental restrictions, or handling requirements.
For example, a synthetic sling tag may identify polyester or nylon construction. That matters around chemicals and heat. Nylon and polyester have different resistance to acids and alkalis, and neither should be used outside the manufacturer’s temperature limits. A tag can also identify whether the sling is an eye-and-eye web sling, endless sling, reverse-eye sling, round sling, or a multi-leg assembly.
Confirm the hardware as well. If a sling assembly includes hooks, master links, shackles, or other fittings, make sure the tagged assembly matches what is being used. Swapping components can change the rated capacity and may invalidate the original assembly rating.
Find the working load limit for the planned hitch
The working load limit, often marked WLL, rated load, or vertical capacity, is the maximum permitted load under stated conditions. This is the number that matters for lift planning, but only when you read the correct line.
Synthetic sling tags commonly list separate capacities for vertical, choker, and basket hitches. Do not assume the largest number applies to every lift. A choker hitch generally has a lower rated capacity than a vertical hitch because the sling bends and tightens around the load. A basket hitch can have a higher listed rating when the load is properly supported by both sling legs, but that rating can be reduced by sling angle, edge loading, or an unstable load.
Read every capacity line, then match it to the hitch you will actually use. If the plan changes at the hook, stop and recalculate. A last-minute change from basket to choker is not a minor adjustment if it changes the available capacity.
Check length, width, and sling angle
A tag may list sling length, web width, diameter, number of plies, or chain size. These details help verify that the sling is the one specified for the work and that it has enough reach to maintain a safe angle.
For bridle lifts, the angle between sling legs and the horizontal is critical. As the angle becomes shallower, tension in each leg increases. The capacity printed for a two-leg or multi-leg sling assembly may be based on a specific angle range stated on the tag or in the manufacturer’s information. Never use a multi-leg rating without confirming its stated angle basis.
Do not confuse the sling angle with the load’s center of gravity. Both matter. Even a properly rated sling can be overloaded if the load is off-center and one leg carries more than its assumed share.
Verify manufacturer and traceability information
The manufacturer name, serial number, stock number, or lot number gives the sling a traceable identity. This is valuable during periodic inspection, incident review, customer documentation, and replacement ordering.
A serial number does not prove the sling passed a current inspection. It does let your team connect the sling to inspection records, proof test certificates where applicable, and equipment logs. Keep records tied to the exact identifier shown on the tag, not a general description such as “green sling” or “20-foot choker.”
Capacity Is Not the Only Decision
A readable tag does not automatically clear a sling for service. Before each use, inspect the complete sling and all fittings. For synthetic web and round slings, look for cuts, holes, broken stitching, melted or glazed fibers, chemical damage, knots, excessive abrasion, damaged protective covers, and distorted or cracked hardware.
For wire rope slings, check for broken wires, kinks, crushing, birdcaging, severe wear, corrosion, damaged eyes, and hook damage. For chain slings, look for stretched links, gouges, twists, cracks, excessive wear, heat damage, and altered or damaged hooks and fittings.
Remove equipment from service when it is damaged, has illegible or missing identification, or does not match the lift requirement. Do not rely on a field repair, tape, paint mark, or verbal assurance to restore a sling to service. Follow the manufacturer’s requirements and your company’s qualified inspection process.
A Fast Jobsite Check Before the Hook Is Loaded
Before the lift starts, the competent person or designated rigger should be able to answer four questions:
- Is this the correct sling type and assembly for the load and environment?
- Does the tag show a legible rated capacity for the planned hitch and angle?
- Does the load weight, including rigging, stay within that capacity?
- Has the sling and every fitting passed visual inspection with no removal-from-service conditions?
This check takes minutes and prevents the usual failures: using a vertical rating for a choker lift, overlooking a reduced-angle bridle capacity, rigging an unknown sling, or assuming a clean-looking sling is approved.
When Proof Load Documentation Is Required
A sling tag identifies the equipment and its manufacturer-rated limits. It is not a substitute for project-specific proof load testing, certification, or inspection documentation when a contract, governing authority, engineer, port operation, or site inspector requires it.
This distinction matters on high-consequence lifts and inspection-driven projects. The tag tells you what the manufacturer rated. Required proof load documentation shows that the relevant equipment or assembly has been tested and recorded according to the project requirement. Review the scope carefully: the requirement may apply to a lifting beam, pad eye, davit, hoist, spreader bar, rigging assembly, or another component beyond the sling itself.
When time is tight, have the equipment identifiers, required test load, capacity information, and project specifications ready before scheduling service. Pacific Load Testing provides mobile proof load testing support for San Diego-area teams that need documented compliance without pulling equipment off the jobsite longer than necessary.
A legible tag is your first checkpoint, not your last. Read it before every lift, match the rating to the real configuration, and remove any sling from service when its identity or condition is in doubt. That is how crews keep the lift moving without gambling with the load, the schedule, or the people below it.